Please Note: This article is written for users of the following Microsoft Word versions: 2007, 2010, 2013, 2016, 2019, and Word in Microsoft 365. If you are using an earlier version (Word 2003 or earlier), this tip may not work for you. For a version of this tip written specifically for earlier versions of Word, click here: Getting Pictures Out of Word.
Written by Allen Wyatt (last updated July 2, 2022)
This tip applies to Word 2007, 2010, 2013, 2016, 2019, and Word in Microsoft 365
When working with other people's documents, you may wonder if there is a way to move graphic images out of the document and into their own files. There are actually several different ways you can accomplish this.
First, try right-clicking on the graphic. In the resulting Context menu, you may see an option called Save As Picture. (I say "may" because this option may not be available for all document formats or for all versions of Word.) Assuming you see the option, click it and you can specify a name and location for the image. This approach doesn't remove the image from the document, it simply saves the image into its own graphics file you can then work with.
Another approach works well if you have a graphics program on your computer—you can simply copy the files from Word to the graphics program. Follow these steps:
If you don't remember installing a graphics program on your computer, you should check to see if Microsoft Photo Editor is on your system. It has been available with several versions of Office, although it is not installed by default. If you would like to install it, you can run the Office setup program to do so, and then use the steps above.
Another approach to getting graphics out of your document is to save the document in HTML format. When you do, Word extracts the graphic images and stores them in their own JPG files. Use these steps:
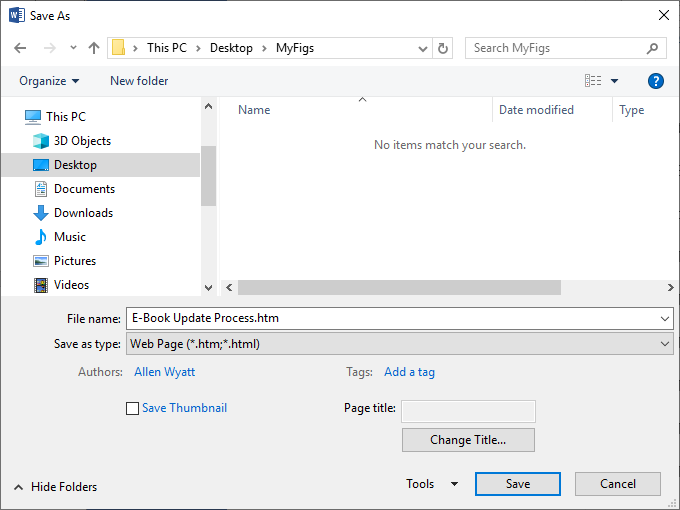
Figure 1. The Save As dialog box, ready to save a Web page.
At this point, the folder contains the HTML document and it also contains a new folder that contains all the images that were in the document. These are regular JPG files; you can open them with any graphics program. There is a drawback to using this approach, however: If you only wanted to save one of the graphics from the document, you will find that all of them have been saved in individual files and you will need to search through them to find the one you want.
WordTips is your source for cost-effective Microsoft Word training. (Microsoft Word is the most popular word processing software in the world.) This tip (11071) applies to Microsoft Word 2007, 2010, 2013, 2016, 2019, and Word in Microsoft 365. You can find a version of this tip for the older menu interface of Word here: Getting Pictures Out of Word.

The First and Last Word on Word! Bestselling For Dummies author Dan Gookin puts his usual fun and friendly candor back to work to show you how to navigate Word 2013. Spend more time working and less time trying to figure it all out! Check out Word 2013 For Dummies today!
Grouping graphics together can be a great way to manage them easier. Doing the grouping, however, could have unintended ...
Discover MoreAdd some artwork around the border of your printed page, and you may not know where that artwork comes from. You may also ...
Discover MoreInsert a graphic into a document and you expect to be able to see it. What do you do if it isn't displayed, however? Here ...
Discover MoreFREE SERVICE: Get tips like this every week in WordTips, a free productivity newsletter. Enter your address and click "Subscribe."
2022-07-04 04:57:36
Ken
Hi Ron
I Inserted JPG files and they stayed as JPG in the image files.
I am using Word 2016 32 bit version. I wouldn't be surprised if things are different in later versions and even in the 2016 64 bit version.
2022-07-04 04:28:15
Ron
Hey Ken:
.
It's been my experience (limited as it is looking at this specific feature) that in my documents all JPGs inserted into a document have been converted to PNGs. It would be nice I could learn how to keep them in JPG format.
2022-07-03 07:12:18
Ken
Ron: The image files in the Media folder can have other formats such as JPG.
It is interesting to see the changes to the image files in the Media folder after the images have been manipulated in the document. If an image is reduced in size by dragging corners the image file and the whole document file are reduced in size and resolutions are changed. I understand that the way that happens was changed in Word 2016 and later versions, earlier versions kept the original image and files were bloated.
2022-07-02 11:20:22
Ron
There is another technique the depends on a little known fact.
.
The new "x-file" format are actually complex composites. The primary file type is text only HTML formatted files. With a few other embedded files types like image files. All of that is wrapped in a ZIP format folder that is renamed with the x-file name, ie DOCX by the application saving the file.
.
Windows 10/11 includes a zip tool.
.
The trick is to rename the Office file with a ZIP file extension, ie rename the file by adding .ZIP to the end of the file name. Windows / File Explorer will now treat the document as a ZIP folder. You can open the folder. In the first level there will be multiple xml files and folders. One of the folders will be the application name, ie Word
Open the folder.
If there are images in the file there will be a "Media" folder
Open it.
.
All of the image files will be there in PNG format.
.
The names are generic, so you'll have to look through all of the images to find the one you want.
Got a version of Word that uses the ribbon interface (Word 2007 or later)? This site is for you! If you use an earlier version of Word, visit our WordTips site focusing on the menu interface.
Visit the WordTips channel on YouTube

FREE SERVICE: Get tips like this every week in WordTips, a free productivity newsletter. Enter your address and click "Subscribe."
Copyright © 2024 Sharon Parq Associates, Inc.
 Please Note:
This article is written for users of the following Microsoft Word versions: 2007, 2010, 2013, 2016, 2019, and Word in Microsoft 365. If you are using an earlier version (Word 2003 or earlier), this tip may not work for you. For a version of this tip written specifically for earlier versions of Word, click here:
Please Note:
This article is written for users of the following Microsoft Word versions: 2007, 2010, 2013, 2016, 2019, and Word in Microsoft 365. If you are using an earlier version (Word 2003 or earlier), this tip may not work for you. For a version of this tip written specifically for earlier versions of Word, click here:
Comments