Please Note: This article is written for users of the following Microsoft Word versions: 2007, 2010, 2013, 2016, 2019, Word in Microsoft 365, and 2021. If you are using an earlier version (Word 2003 or earlier), this tip may not work for you. For a version of this tip written specifically for earlier versions of Word, click here: Adding Table Columns to Columns with Merged Cells.
Written by Allen Wyatt (last updated November 5, 2022)
This tip applies to Word 2007, 2010, 2013, 2016, 2019, Word in Microsoft 365, and 2021
Patrick has a table in which the top cells of two adjacent columns are merged. Word dutifully adds a column if he positions the insertion point within a cell of the first of the adjacent columns (but not in the merged cells) and then inserts a column to the right of the insertion point. Unfortunately, Word also adds a blank cell at the right of the merged cells.
This behavior is normal for Word. Let's say that your table consists of three columns, which we'll call A, B, and C. If you merge the first row's cells in columns A and B, you now have two cells (one large and one small) in the first row and three cells in each of the other rows. Position the insertion point into a column A cell that is not the first, merged row and insert a column to the right and you discover that Word adds a new column B and pushes the other columns (old B and old C) to the right. This means that Word has to add a cell to the right of the merged cells (in new column C), else the first row would be incorrect. What you end up with after the insertion is a first row with three cells (one large and two small) and the other rows with four cells—just as you should.
The supposed problem comes in when your table has all the cells in the first row merged. For instance, you may have a table that has two columns and the two cells in the first row are merged into a single cell. When you insert a column to the right of the first column, Word also adds a cell to the right of the first, merged cell. What you might expect, however, is that Word would insert the column without affecting the merged cell, such that the single merged cell would now span three columns instead of the old two.
There is no way to do this when doing a simple column insert. There are a couple of things you can try, however. One method is to split the merged cells in the top row, insert the desired column, and then merge the three cells into one.
You could also go ahead and insert the columns as already described. Then select the old merged cell and the new added cell in the first row and merge them again.
Another method is to separate the merged row from the rest of the table by splitting the table. You can then insert the columns as desired and recombine the previously split tables. Of course, you will then need to expand the width of your merged cell so that it fully covers the three columns below it.
Finally, you can insert cells instead of inserting columns. Assuming that your two-column table has ten rows, follow these steps:
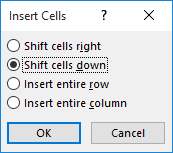
Figure 1. The Insert Cells dialog box.
Word shifts the selected cells to the right and inserts blank cells. The top row remains unchanged, with the merged cells still spanning the first and second columns. If you want the merged cells to span all three columns, you'll need to drag the cell border so it is the desired width.
WordTips is your source for cost-effective Microsoft Word training. (Microsoft Word is the most popular word processing software in the world.) This tip (9893) applies to Microsoft Word 2007, 2010, 2013, 2016, 2019, Word in Microsoft 365, and 2021. You can find a version of this tip for the older menu interface of Word here: Adding Table Columns to Columns with Merged Cells.

Create Custom Apps with VBA! Discover how to extend the capabilities of Office 2013 (Word, Excel, PowerPoint, Outlook, and Access) with VBA programming, using it for writing macros, automating Office applications, and creating custom applications. Check out Mastering VBA for Office 2013 today!
Print a table and you may be surprised if it has no borders. That could be because you actually have the borders turned ...
Discover MoreDo you need a quick way to format your tables? Believe it or not, there are several tools you can use from Word's arsenal ...
Discover MorePress the Tab key in a table, and Word dutifully moves to the next cell in that table. Press it in the last cell of a ...
Discover MoreFREE SERVICE: Get tips like this every week in WordTips, a free productivity newsletter. Enter your address and click "Subscribe."
There are currently no comments for this tip. (Be the first to leave your comment—just use the simple form above!)
Got a version of Word that uses the ribbon interface (Word 2007 or later)? This site is for you! If you use an earlier version of Word, visit our WordTips site focusing on the menu interface.
Visit the WordTips channel on YouTube

FREE SERVICE: Get tips like this every week in WordTips, a free productivity newsletter. Enter your address and click "Subscribe."
Copyright © 2024 Sharon Parq Associates, Inc.
 Please Note:
This article is written for users of the following Microsoft Word versions: 2007, 2010, 2013, 2016, 2019, Word in Microsoft 365, and 2021. If you are using an earlier version (Word 2003 or earlier), this tip may not work for you. For a version of this tip written specifically for earlier versions of Word, click here:
Please Note:
This article is written for users of the following Microsoft Word versions: 2007, 2010, 2013, 2016, 2019, Word in Microsoft 365, and 2021. If you are using an earlier version (Word 2003 or earlier), this tip may not work for you. For a version of this tip written specifically for earlier versions of Word, click here:
Comments